Welcome To Thrill Addicted

Recent Posts

Scuba Diving for Beginners: Certification, Equipment, Safety


Scuba Diving for Beginners

So, you have decided to take the first step on your journey to Scuba Diving mastery. Congratulations!

But I bet you have a lot of questions. Trust me, most people do. Learning can be a confusing process, and without someone in the know to guide you, it can be hard to know where to start.

When I decided to take the plunge a few years ago, I had no idea where to go to learn, what equipment I needed to purchase or a lot of answers to my many questions. That’s why I have put together this comprehensive guide to Scuba Diving for beginners.

From PADI accreditation to preparing your equipment, here is everything you need to know about learning to Scuba:

Scuba Diving for Beginners

How to Become a Certified Scuba Diver?

The world of Diving is a popular one, but it is not government regulated. This means that you won’t have to sign any papers or request any permits to get started.

However, this does mean that you may need to become accredited before you hop into the ocean.

In other places, certification is not required. But getting it anyway is still a really good idea.

What is the best Scuba Certification?

You have a lot of options when choosing what lessons, you will take to become certified. However, your options will also be limited by your geographic location – or how far you are willing to travel.

In most places, your first choice should be to look up your nearest PADI location. PADI (the Professional Association of Diving Instructors) tutors are all trained to the same standard, no matter where they are located around the world.

PADI tutors teach a three-phase course that will take you from newbie to competent diver in only three short instalments. These courses are flexible and performance-based, which means you can progress as quickly (or as slowly) as you would like to.

How much do lessons cost?

Compared to other adventure sports, learning to scuba is among the cheapest available to the public. However, becoming accredited isn’t free. The price will also vary from location to location, so it’s worth doing your research ahead of time.

The three phases of becoming accredited, and their (average) prices, are:

Phase 1: Online Knowledge Development

Once you have located your nearest PADI Dive Shop, you will be able to enrol in the Knowledge Development online course.

This course will run you through the essential theory of Scuba Diving, featuring lectures, questionnaires, an instructor available to answer any questions you may have, and a final written exam at the end.

The online course will cost around $150 to complete and can easily be finished in a day.

Phase 2: Confined Water (Pool) Dives

Once you have passed the online knowledge development course, it is time to get into the water.

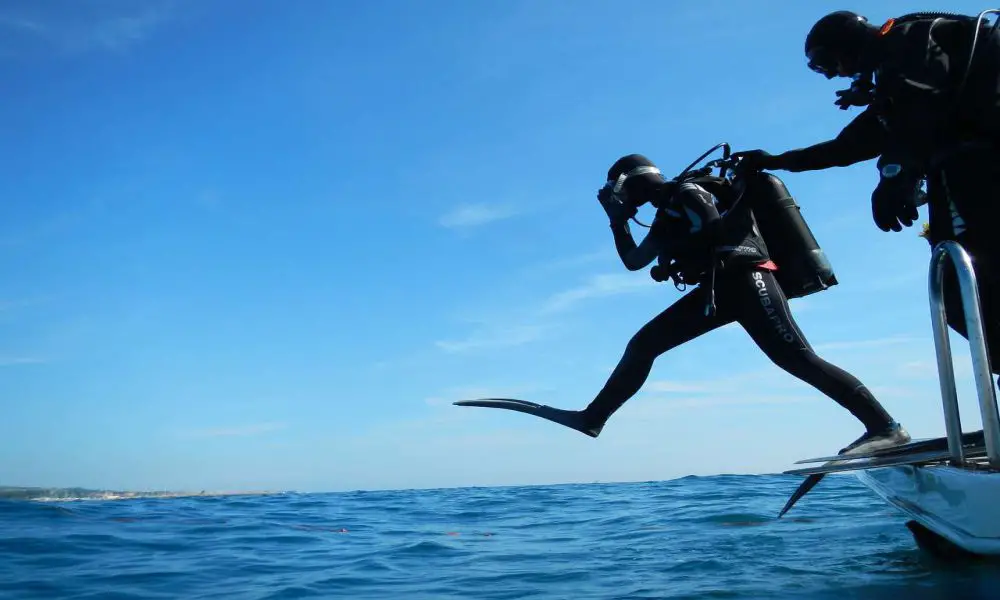
In the Confined Water Dives phase, you will spend a few days developing basic practical diving skills in a controlled environment. You will also learn how to choose, set up, and use all your gear.

This course will cost around $200 to complete.

Phase 3: Open Water Diver

By the end of phase 2, you will be ready to put your skills to the test in the open ocean.

In this final part of the accreditation process, you will complete four or five dives that will equip you with all the skills and understanding necessary to grab a buddy and go out alone.

To complete the Open Water Diver course, you must first demonstrate basic water skills, including:

  • Being able to Swin 200 meters without stopping.
  • Float and tread water for 10 minutes.

Your third certification, the open water training course, may also require a range of additional expenses to get to the physical location it takes place. After all, it requires access to the open ocean.

That could be $5 in gas to drive to the beach (if you’re lucky) or $500 to book a week-long trip. Your PADI Instructor can refer you to a PADI Instructor in another location if you will be expected to travel.

What Equipment do you need for Diving?

But when beginning to learn, we strongly recommend purchasing the essentials. Although it is possible to rent them on site, it is hard to overstate the benefits of always having gear you trust is well-fitting, comfortable, well-maintained, and reliable.

The three basic requirements are:

  • Mask
  • Snorkel
  • Fins

Before embarking on phase 2 of your accreditation process, your PADI Instructor will help you choose the right gear.

Full Scuba Diving Equipment List

However, when you are earning your certification and beginning to dive for real, you are going to need the wide range of diving equipment available to you. Here’s a quick primer to the essential diving equipment:

  • Wetsuit or Drysuit (Otherwise known as a Wetty, Steamer, Shorty, or Spring Suit)
  • Weight System
  • Buoyancy Control Device (BCD)
  • Dive Computer/Dive Planner
  • Scuba Tank

The correct equipment for each dive will vary from location to location, so for this reason, it is not recommended to purchase any of these for yourself. You will be able to rent these from dive sites around the world.

Finally, during the Open Water Diver course, you will get to grips with all of these, so don’t worry if they seem intimidating right now!

Guide to Using Scuba Masks for Beginners

The scuba mask is an essential item for any divers, from beginners to those with years of experience.

Here are a few of the most frequently asked questions about using masks from beginners.

How to Clear Scuba Mask Underwater?

Clearing your mask is also one of the most important skills any diver should know and can save them from sticky situations if their mask gets moved or knocked.

To do so, divers will need to use their nose to blow any water out of their mask while keeping the top seal secure.

It can be tricky, so here are a few tips to help you get the hang of it:

  • Try practicing in the shallow part of the pool. Water in your mask is likely to cause you a bit of panic the first couple of times you experience it, so knowing you can easily reach the surface if anything goes wrong will help you keep your cool.
  • Practice dipping your head in the water with your snorkel, but no mask. This will help your body trust that even without a mask you can still breathe.

How to Prevent Scuba Diving Mask Squeeze: What causes it?

‘Mask Squeeze’ is when the pressure increases outside your mask as you dive, squeezing the airspace inside your mask and causing discomfort or bruising.

To prevent it, simply use your nose to blow some air into your mask, equalising it with the pressure outside your mask. Some divers also use the Valsalva Manoeuvre to equalise the pressure around their head.

How to eliminate ‘Mask Fog’?

Mask Fog can be annoying, but also can be potentially dangerous if it seriously diminishes your vision mid-dive.

Here are a few ways to eliminate the risk of ‘Mask Fog’:

  • Wash your mask with a pre-dive wash before you begin. Although many divers opt for a premium mask-care product, others simply use toothpaste as a pre-dive wash to prevent mask fog.
  • Use a Defogger Solution. This is a liquid spray or serum which, when applied pre-dive, will ensure that your mask doesn’t fog up. Some also use Baby Shampoo as an alternative, which appears to work just as well.

Scuba Diving Depth for Beginners

For beginners, common diving depths will vary from 9 to 20 meters. However, as divers get more experienced, they can expect to progress to deeper and deeper dives.

Here are a few of the most frequently asked questions about diving depths, from beginners.

How Deep Can You Dive Before Being Crushed?

Divers cannot go as deep as they like without consequence. Deep dives put a lot of strain on the body, including potentially lasting organ damage. The biggest risk is being crushed by the increasing weight of water, which can put pressure on your lungs and make it impossible to breathe.

For this reason, advanced divers usually stop their dives at around 40 meters. Divers with the Phase 3 Basic Open Water certification can dive a maximum depth of 18 meters, whereas those with the Advanced Ocean Water certification go as far as 30 or 40 meters.

How Deep Can You Dive Without Decompression?

After you dive more than 6 meters (20 feet) underwater, it will become necessary to make decompression stops on the way back up.

Without making decompression stops, the body’s build-up of compressed nitrogen can cause decompression sickness.

Conclusion

Congratulations again on taking the first steps on your journey, I promise you that you have some great times ahead!

I hope you found this comprehensive guide enlightening and that your main questions have been answered. If not, remember: your instructor is there to answer all your questions as you learn, and there is no question not worth asking.

Is Paragliding Safer Than Skydiving?


Paragliding and Skydiving are popular picks for people looking for a full-body adrenaline rush. Skydiving is more intense than paragliding, but both sports come with risks. If you’re looking to get started in either sport, how do you gauge the safety of paragliding versus Skydiving?

Whether you’re sailing through the sky or jumping out of a plane, both sports aren’t as dangerous as most people suppose. Fascinating fact: You’re more likely to die in a car accident. But one is safer than the other. Would you have guessed Skydiving? If you did, you guessed correctly.

Paragliders and skydivers are doing their thing daily in America, and many days pass without fatalities or injuries. Here are the numbers:

Paragliding sees 18 deaths out of 242,355 flights. As for Skydiving, there are 13 deaths out of 3,000,000 jumps.

Of course, neither sport is truly safe. That small window of risk is a big part of where the thrill comes from. But the person taking part in these sports has a lot of control over just how dangerous their jump or their flight is. By looking at the risks, we can appreciate the precautions.

Is Paragliding Safer Than Skydiving

The Risks: A Bird’s Eye View

The risks and danger levels of paragliding and Skydiving are at an all-time low. Technology has contributed to great strides in safety. Veterans of the sport have passed on what experience has taught them and made those lessons practical.

Be that as it may, nobody is more responsible for your safety than you are, no matter what kind of lifesaving technology you have strapped to your back as you fall out of an airplane.

By being fully informed, you can be fully prepared. When done correctly, Skydiving and paragliding are both exhilarating experiences. Some call them the closest thing to flying that humans can experience.

You don’t want to sour that once-in-a-lifetime experience by turning it into a last-in-a-lifetime experience.

How Safe is Paragliding

Paragliding has become a staple of tourists trying to snatch up every last experience of freedom before their holiday is over with.

It’s easy to see the appeal of soaring through the sky like a seagull with no big airplane obstructing the view.

A paragliding pilot has nothing blocking their view except a few straps of the harness that they’re sitting in and the large glide-friendly parachute above their head. There’s no motor to make noise since the pilot manages their flight by catching air currents.

Just to be sure of all things, the pilot is also equipped with an emergency parachute.

Paragliders don’t have brakes like bicycles do, so the risks and dangers in paragliding tend to come from the challenge of mastering free-flight. Pilots that are just getting used to steering could lose control. Overconfident pilots might take unnecessary risks. So there’s a unique responsibility to the individual flyer to be sure that they aren’t a hazard to themselves or others.

This report reveals that only 18 deaths were recorded out of a total of 242,355 paragliding flights, also with 64 injuries.

Most of those weren’t deadly injuries and nothing grievous, amounting to sprains and minor scrapes. The rest were lower and upper fractures of extremities. Out of those 18 deaths, the majority were due to multiple injuries. So incidents in paragliding do not automatically spell death.

The Novice Pilot is More Dangerous Than the Flight

Instructors have a name for the cause of most paragliding accidents, and it’s called “intermediate syndrome.”

After two or three successful flights, the pilot suddenly feels that they’re a superhero with no need for caution and no vulnerability to danger.

It isn’t a light-hearted joke. Those first 10 flights are where 90% of the big accidents take place. This calls for constant vigilance and caution even when you’re pretty sure that you’re in control.

There are the odd times that equipment malfunction is to blame, but 95% of these accidents can be attributed to human error. Actual equipment malfunction is extremely rare.

First-time and one-off paragliders are actually at much lower risk than novice pilots. Having an experienced instructor with you lowers that first-time window of disaster even more.

Injury-free paragliding is more about self-control than quality control.

If you have persistent fears about paragliding, you have options. You can get in touch with the company that booked you, and they will fill you in about all the safety precautions as many times as you need to.

Paragliding is safe enough that it can be carried out by pilots of all ages.

Children as young as five (with the supervision of an adult or parent, of course) have partaken in the sport. Other pilots have been as old as 90. But anyone that’s under the age of 18 will need to have written consent from their parents.

How safe is Skydiving

While paragliding is a pleasant cruise through the sky, Skydiving is jumping out of an airplane and plummeting like rock with arms and legs.

Onlookers tend to think that Skydiving is a fairly dangerous sport. Believe it or not, you’re still safer jumping out of an airplane than you are driving your car.

Especially if you’re a first-time jumper, the odds of disaster are very, very low.

Chances of Fatality While Skydiving

Out of the 3,000,000 skydiving jumps taken per year, only 13 fatalities were recorded in 2018, that’s nearly half the rate since the 1970s, the lowest rate since 2000. You can view the source for this information here. So if you took one jump per year, your rate of a fatality would be one in 100,000.

If you want the safest skydiving experience possible, then you want to look into tandem jumps. They’re just as the name suggests.

Tandem jumps are usually the first experience for anyone on their first jump. You’re strapped to the person of an experienced instructor who’s going to make sure you’re alright through the whole experience.

The odds of a fatality in a tandem jump are 1 in 750,000. Injury rates are 1 in 1100. So while not danger-free, Skydiving is still a statistically safe undertaking.

How To Be Sure You’re Safe

Believe it or not, you’re the safest when you’ve never flown before. If you’re throwing yourself out of an airplane for the first time, you’re at much lower risk of life and limb than the people that have done it 10 times or 50 times.

The reason is simple. You’re scared out of your shorts. Your survival instincts are making you memorize the manuals and safety videos until you can recite them from memory forwards and backward. You’d rather burn at the stake than go against anything in the manual.

Safety checks and procedures become dull routine after the hundredth time you go through them, so it becomes easier to hand-wave them away as unnecessary. To quote a pilot that had been flying an airplane for years but still took the time to do a preliminary systems check:  “Anyone that doesn’t do this before they get in the air is a fool.”

If you’re looking for an experience that is 100% safe without any risks whatsoever, then you might want to look for another hobby. Skydiving and paragliding wouldn’t bring that zing if they were danger-free.

Is Kayaking Dangerous? An In-Depth Look at Kayaking Safety 


is kayaking dangerous

Scared to go kayaking? Don’t be. It’s true that kayaking accidents do happen. However, only those who are careless enough are the ones involved in accidents.

Kayaking wouldn’t have become popular if it were very dangerous. In fact, a kayaking excursion is just as fun as a road trip with a bicycle or motorbike. Don’t think about some safety issues that you’ll encounter, and you’ll discover the peerless fun that kayaking brings—scenic sights of trees, meadows, or coastlines, a good tan, and a breezy cruise.

Nevertheless, being scared with kayaking like a chicken is fine if you have experienced some watercraft-related accidents before. Allow this article to calm your nerves by discussing wh kayaking isn’t as dangerous as you think.

Is Kayaking Dangerous

How Dangerous is Kayaking?

Kayaking, similar to other water activities, isn’t perfectly safe. Collisions, flip overs, deflation (in case of inflatable kayaks), and maneuverability issues are some of the perils involved with kayaking.

But know that enjoying the kayak is relatively safer than your everyday safari tour and sky jumping sessions. So, please stop being paranoid about it. Load your kayak on the car and head to a kayaking location now. Don’t waste your day doing nothing at home.

Probability of Accidents and Injuries When Kayaking

Accidents that lead to mortal and minor injuries are rare when it comes to kayaking. There’s only a 2.1%–2.9% chance for kayaking-related accidents to happen. This is pretty low compared to other water sports such as surfing, scuba diving, and shark cage diving.

Speaking of injuries, how do experts classify kayaking-related ones? Experts classify injuries that people experience while kayaking as trauma from striking an object, traumatic bodily stress due to the rider’s positioning with respect to the current, overuse injuries, and submersion and environmental injuries.

Blisters on the hands is the most common injury while kayaking. These aren’t serious. However, blisters can affect maneuverability since the hands are greatly involved when controlling the kayak.

Injuries on the shoulders are as common as blisters. These are due to incorrect riding position and the use of paddles that don’t suit the torso length of the paddler.

In connection, the shoulders together with the wrist often suffer from chronic injuries due to kayaking. Shoulder and wrist injuries in kayaking are usually characterized by short stabbing pains, loss of grip strength, and swelling (especially the wrists).

An ultimate concern for those who are afraid of kayaking is when the kayak flips over. This is a topic that needs a more in-depth discussion. To learn more, proceed to the section below.

Do Kayaks Flip Over Easily?

Answering this question with a yes or no is impossible. Being prone to flipping is largely dependent on whether the kayak is inflatable or hardshell—simply put, the type. Moreover, dimensions and design is other factors that determine it too.

Inflatable kayaks, if not inflated well, flips over easily. If not bloated with enough air, these kayaks are nothing but flimsy. They can’t displace the surface area of the water well and becomes wobbly, which could result in flipping over.

Hardshell kayaks don’t flip, not unless you exceed their weight limit. That’s why it’s important to take note of weight capacity when you’re buying hardshell kayaks. For a recommendation, it’s best to buy a hardshell kayak that has a minimum weight capacity of 100 pounds.

Dimensions affect the susceptibility of the kayak to flipping over. It’s common knowledge to seasoned kayak owners that wide kayaks don’t flip over easily, and narrow ones don’t think twice about turning from their bottoms with the slightest sway or juggle.

However, this isn’t the case for slimly or narrowly designed kayaks all the time. Some kayaks that aren’t wide still display perfect balance hulls, which may be installed with a keel or a skeg. If you’re buying a streamlined kayak, ask the seller if it comes with these.

Why Does a Kayak Flip?

Inflatable kayak flips due to the lack of air in their chambers. Lack of air on their chambers might be due to punctures or poor design of the air insertion valve.

Improper riding cause flipping over in the case of tandem kayaks. A probable reason is that the riders’ weight might be unevenly distributed in the cockpit.

Rocking the kayak causes flipping too. A slight elevation of the bow or stern up in the air can disturb the weight distribution on the kayak.

If your kayak has a skeg and keel, don’t even plan on removing them, even if they’re detachable. The skeg and keel are integral for kayaks that have them. If they’re removed, the kayak will suddenly get wobbly and less responsive to directional changes.

Installing a motor that’s too strong for the kayak can cause flipping. Note that this is only applicable for kayaks that are already installed or can be installed with motors. The kayak flips over if ever the torque of the motor causes the kayak to digs its stern on the water and raise its bow.

What to Do if the Kayak Flips?

It’s not the end of the world of the kayak flips, so remain calm. A kayak that flipped won’t sink, and it won’t drag you under the water. That’s said, avoid panicking because you’re all good.

Dive and swim deep as soon as you realize that the kayak is starting to flip. You have to swim deep so that the kayak won’t hit your head when it flips over. It’s crucial to remember this tip if you’re using a hardshell kayak. A flipping hardshell kayak is durable enough to wound your head if it hits.

What if you’re not a strong swimmer? Assuming that you’re wearing a life vest, cover your head with the hands as soon as the kayak flips over. By doing so, the cockpit of the kayak will hit the hands instead of the head. It’s better for the hands to get injured because you don’t want to suffer head injuries and get dizzy. Dizziness will make it impossible for you to ask for help or make your way toward the bank.

If you have a whistle with you, blow it with all your mouth to inform someone that you’re in trouble. Lifeguards are patrolling around kayaking locations, so rest assured that somebody will always come to help you.

But you’re on your own if you’re kayaking in a location where no other people are around to help. In this situation, it’s better to leave the kayak and head to the bank or get back to riding it.

The second option requires skill on your part. Proceed to the next section to teach yourself how to get back on a kayak that flipped over.

How Unflip a Kayak?

Unflipping a light kayak is very easy. All you have to do is push one of its sides upwards so that it returns to its original position. You may use your paddle if your arms are too weak to do the job.

A heavy kayak requires more work to get unflipped. To unflip it, you have to rock one of the sides with increasing intensity. You have to involve your body weight while rocking it aside from your arm strength.

How to Get into Kayak after Falling Out?

Falling out of the kayak is another problematic situation that you have to anticipate. Fortunately, it’s not as dire as flipping over because the kayak is still floating fine.

The first thing to do if you fall out of the kayak is to swim toward it. If the rapids are strong, just let the current take you to the kayak. Conserve your energy because you will need it to haul yourself.

Once you’re near the kayak, go to the side nearest to you. After that, grab the other side that’s adjacent to it. You don’t want to grab the side that’s in front because doing so will cause the kayak to flip over.

When you successfully grabbed the adjacent side, slowly pull yourself back to the kayak’s cockpit. Wiggle your body, brush your knees on the side of the hull, or flex your arms—do anything that will help your torso lift back up toward the kayak.

Everything easier if the kayak has a rope or grooves on its sides. The rope and the grooves make it easier for you to get into the kayak after falling out because they accommodate your hands and arms, which is something that you badly need to haul yourself up quickly.

How to Get Water out of a Kayak Hull?

Most kayaks already have a self-bailing mechanism. This feature will remove the water out of the kayak hull for you. Still, it can malfunction. That’s why you have to keep a close watch when this happens.

If the self-bailing mechanism fails and the kayak hull starts to get filled with water, use your hands to scoop the water out. This method is already useful if the entrance of the water to the kayak hull isn’t strong.

On the other hand, if the water is entering fast, use any container that you have with you to keep the water out. Even a piece of flat plastic will do. What’s important is that the tool that you will use has to efficiently scoop most of the water that penetrates the hull.

But know that instead of getting the water out of the kayak hull, it’s better to make your way towards the bank. Water entering the hull means that your kayak will sink anytime soon.

How to Keep a Kayak from Sinking?

Keeping the kayak from sinking is easy. Be sure that you’re not exceeding its weight capacity, check for holes and cracks on its hull, and if there are any, seal them with a patching kit or epoxy, and avoid rapids that the kayak is unsuitable for.

You can’t stop a kayak once it starts to sink. There’s no going around with this problem. However, this doesn’t mean that you’re done for. Though stopping it is impossible, you may delay it nonetheless.

Throw unnecessary objects out of the kayak. By throwing them, you are decreasing the weight that the kayak is carrying. If weight is decreased, the kayak can float for 5 to 10 minutes before sinking—enough duration for you to get back on land.

How to Get into a Sit-On-Top Kayak from a Dock Safely?

Follow these steps to get into a sit-on-top kayak from a dock:

  1. Get a rope and tie one its end on the sit on top kayak
  2. Tie on the other end of the rope into the poles or pillars on the dock
  3. Be sure to tie the rope short and tight
  4. Ask someone to hold the rope for you to prevent the sit-on-top kayak from wobbling
  5. Place one of your legs on the cockpit of the sit-on-top kayak. Secure your footing and follow to placing your other legs on the cockpit
  6. Sit on the kayak seat, place the paddles on the paddle, and you’re good to go

What is the Best Way to Get in and out of the Kayak?

The best way to get in and out of the kayak is to do it in the most shallow part of the river, lake, or near to you. Getting in and out in shallow waters is better than getting in and out with the help of a dock because you may hold the kayak to keep it steady.

What Equipment to Use to Stay Safe on the Kayak?

Bright colored clothing, carbon fiber paddle with rubber-coated handle, whistle, kayak helmet, and elbow and knee pads ensure your safety while kayaking.

Brightly colored clothing and a whistle allow other people in the kayaking location to notice your presence without fail. This equipment prevents collisions and is very useful if ever you are in need of rescue.

A carbon fiber kayak paddle with a rubber-coated handle is great for leaning against rocks and other obstacles for evasive maneuvers. Carbon fiber paddle is light on the arms, so it doesn’t deal with your shoulders and harms overuse injuries. On the other hand, its rubber-coated handle won’t blister your hands.

Kayak helmet and elbow and knee pads ensure that you don’t injure your limbs and head. It’s common for these body parts to get bruised, sliced, or fractured in case you fall off of the kayak or in case the kayak flips over.

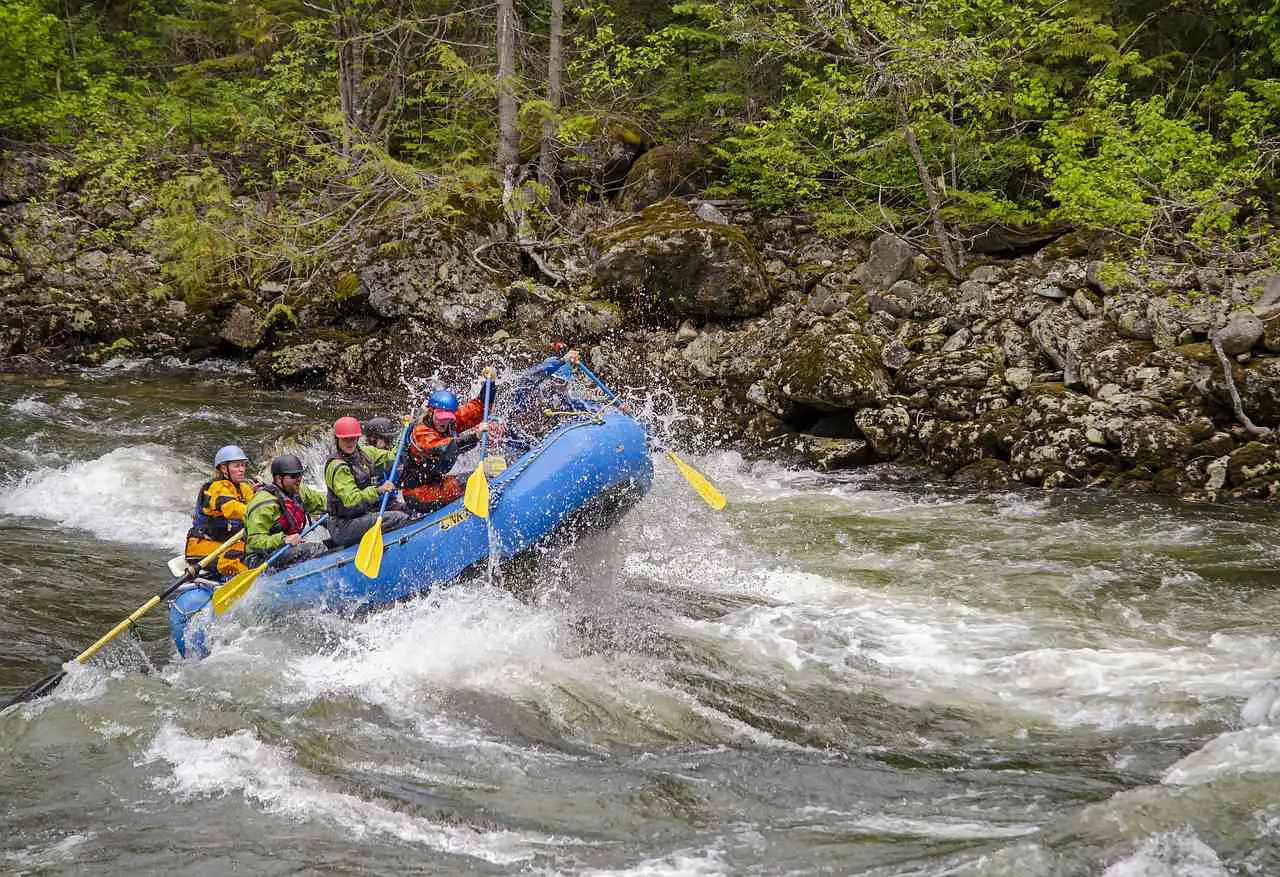
Is Whitewater Rafting Dangerous


Is Whitewater Rafting Dangerous

If you’re interested in extreme sports, you might be starting to wonder about whitewater sports and how dangerous they are. Anyone who likes this sort of sport may be asking is whitewater rafting dangerous?

In answer to that question, any sport of this nature does carry some inherent risks. However, it may not be as dangerous as its reputation suggests. Many companies offer it as a popular outdoor pursuit, and if done properly with good safety precautions, it can be pretty safe.

Is Whitewater Rafting Dangerous

Is White Water Rafting Safe For Nonswimmers?

The danger of any water sport will climb significantly for non-swimmers. If you cannot swim, you are much more likely to get into difficulty if you fall in.

You will be given a life jacket if you’re doing this with a company. However, you shouldn’t wholly depend on your life jacket to keep you safe, especially in strong currents. The buoyancy of the jacket may not be enough to make you float. You might have to swim to the side or with the current to get to a calmer patch of river.

If you cannot swim and you end up falling off the boat, you may find it difficult to get back to shore. You might also feel less safe overall, which will make the activity less enjoyable. While this activity is often done in shallow rivers, not being able to swim can be dangerous. This is particularly true on difficult courses.

If possible, it is better to do some swimming practice before you partake in this activity. You do not need to become a strong swimmer, but being able to swim enough to direct yourself is a good idea.

Anyone who cannot swim should think carefully before joining this activity. Check that the course is reasonably easy and discuss the implications with the experts before you book the activity so you know what to expect.

Are River Rapids Dangerous?

This will depend to a large extent on the river rapids in question. Some rapids are certainly dangerous, especially for inexperienced people. Others are less so, even for beginners.

You should choose rapids that are suitable for your level of experience. If you are going with an experienced group, more difficult rapids may be suitable, but don’t get out of your comfort zone. There is an international standard that grades rapids so you can find out what is suitable no matter where you are.

A level two is often good for beginners.

What makes rapids more dangerous? Fast currents are particularly dangerous, and steep areas are even more so. If there are narrow patches or places with lots of boulders, the difficulty will increase. It is important to assess all of these factors in advance.

You should also look at whether there are any waterfalls in the course. Think about the height of the drop and the skill of the crew members before tackling waterfalls.

Equipment For White Water Rafting

You might be wondering what you need for this activity. Many companies will supply equipment for you. You should expect a crash helmet to protect your head from overhangs or bumps if you fall out of the boat.

You should be given a life jacket to help you stay afloat. A waterproof bag is also often provided to keep belongings safe. A safety whistle is another good thing to have, and you should take your own if they aren’t supplied.

Obviously, you will need a craft and paddles, which should be provided by the company. If you are going with friends, ensure the craft is suitable. You must always check that they are knowledgeable and experienced before agreeing to go white water rafting with friends.

What to wear will depend a little on the weather. A wetsuit is often useful, or you can choose moisture-wicking, light clothes. Shoes should be comfortable and well-fitted, fastened to your feet so they won’t come off if you fall. Protective footwear that fully covers the foot is important.

Do not wear cotton, as this tends to absorb and hold onto moisture, and can be slow to dry. It is often a good idea to carry a spare set of clothes. You should definitely have some warm things to put on if you get wet or chilled. If possible, take something warm to wear during the activity, and a separate outfit for afterward.

If you wear glasses, make sure you have a strap so that they won’t be lost if they fall off your face. You may also want to take sunscreen, a sun hat, a towel, water bottles, and snacks. If you are going in cool weather, take a woolly hat, gloves, and dry thermals to put on if you get chilled.

Is There A Weight Limit To White Water Rafting?

Not exactly, but weight needs to be taken into consideration. In general, most companies don’t provide weight limits, but they do require participants to be physically fit in order to prove they can be safe on the water.

You will need to be able to wear the safety equipment provided, so you should check with companies in advance if you are overweight. Make sure they have equipment that will fit you, particularly the life jacket.

Think about your ability to contribute to the course. This activity is often hard work and will involve a lot of paddling. If you aren’t fit enough to help, you may not enjoy it.

What Do You Do If You Fall Out Of White Water Rafting?

Perhaps one of the biggest aspects of “is whitewater rafting dangerous” is what to do if you fall out. Companies will offer their own guidelines on this, but here are some suggestions.

  • Grab onto the raft until someone can pull you back on.
  • Face the raft so you can be pulled on more easily.
  • Lift your feet to the surface to avoid them getting tangled in the riverbed. This is one of the biggest dangers, so get your toes above the surface fast. Face your feet downstream.
  • If you have lost hold of the raft, wait for a rope or paddle to be extended so you can get back on.

10 Safety Tips For White Water Rafting

Things you should and shouldn’t do while rafting:

  1. Don’t ever stand up in the rapids. Swim to the shore instead, or you could get badly injured.
  2. Follow your guide’s instructions.
  3. Always wear a flotation device that will keep you up if you get too tired to swim.
  4. Keep your hands on the “T” grip of the paddle.
  5. Do not panic – easier said than done, but panicking will bring you more trouble than help.
  6. Check out the company and ask questions about their audits and safety procedures before you book.
  7. Build up to difficult courses slowly.
  8. Never go alone or without at least some experienced members.
  9. Only raft during the day unless on a specifically organized night trip with a reputable company.
  10. Know your own limits, exercise in advance, and do not push yourself beyond safe points.

Summary

So, to answer the question “is whitewater rafting dangerous?”, it can be if people approach it carelessly and do not follow safety procedures. However, it has quite low accident figures compared with other sports such as horse riding.

All sports carry a risk of injury. However, if you follow instructions and wear the appropriate gear, white water rafting can be fairly safe.

Inflatable Kayak Vs Hard-Shell: Pros And Cons


Inflatable Kayak Vs Hard-Shell: Pros And Cons

If you have recently become a fan of kayaking, you might be considering purchasing your own kayak. Perhaps that has left you wondering – hard-shell or inflatable? What are the advantages of inflatables, and what payoffs do these come with?

Inflatable kayaks are superior in terms of their weight, storage requirements, and portability. They can be as durable and stable as traditional hard shells. However, you will have to spend valuable time inflating them on every use, and many people find them trickier to control.

Inflatable Kayak Vs Hard-Shell

What Are Inflatable Kayaks VS Hard-Shell Kayaks?

Inflatables, as the name suggests, are filled with air, which means that they are very light and easy to store. They have been increasing in popularity for years, and technological advances mean that they perform comparably with hard-shell kayaks in many cases.

Hard shells can be made of a range of materials, including wood, Kevlar, polyethylene, fiberglass, carbon fiber, etc. They have a rigid structure and do not pack down, but many have better durability and control than their inflatable counterparts.

If you’re trying to decide whether to buy a blow-up kayak, here are some of the advantages and disadvantages to help you with your decision. We’ll start with the pros.

Pros

Durability

You might expect a rigid kayak to be more durable than a soft-shell, but actually, inflatables are very tough. They have been specifically designed to withstand the knocks and bumps associated with kayaking and they are able to bounce off when they hit something.

Of course, inflatables do have more of a risk of being punctured or torn. However, a high-quality one should last extremely well.

Drop-stitch inflatables can be inflated to high pressures, meaning that they are very comparable to a hard-shell. While they do tend to be expensive, if you’re looking for something that will stand up to knocks and bumps, these are perfect.

Price

As you might guess, blow-up kayaks are often cheaper than rigid ones. It should be noted, however, that this won’t always be the case. Some inflatables are so well-built that they cost a lot of money.

In terms of quality, if you measure a like-for-like hard-shell against an inflatable, you will probably find that the inflatable comes out cheaper. This may not be the case absolutely all of the time, but it usually is. This should help guide your decision on what to buy.

Portability

Obviously, a huge advantage of a blow-up kayak is that it is very light and very portable. While deflated, it takes up very little space in a car, so you can leave room for other equipment. This is ideal if you want to go kayaking while on a camping holiday, etc.

Even if you have boats for the whole family, they should be easy to fit in the car. They won’t take up valuable space that could be used for other things. They don’t need a dedicated roof-rack.

They are extremely light, too, meaning that you will use less fuel while transporting them. They are also easy to carry down to the water, and back up to the car after a long and tiring session. This is a big plus for many people, especially those kayaking with children.

Blow-up kayaks usually weigh around 25-30 pounds, compared with a hard-shell’s average 40 pounds.

Storage

Again, soft-shells come into their own if you have a small amount of storage space at home. If you love kayaking but rarely get to go, it may seem difficult to justify the space that a rigid version will take in your home. Meanwhile, an inflatable can be packed down to almost nothing and stored in a cupboard.

Stability

If you think that a hard-shell is bound to be more stable than an inflatable, you might want to think again. Soft-shells often have wider bases than hard-shells, and this can actually make them more stable in the water.

This is a big plus for beginner kayakers or kids, who might struggle to keep the boat level in the water. They are also good for experienced kayakers.

Capacity

You might be surprised to learn that soft-shells are often superior in terms of their weight-bearing. Many inflatable kayaks will hold a bit more weight than the comparable rigid boat. This might be important to you if you’re transporting gear in your boat.

Easy Repairs

If you carry a puncture repair kit with you, it’s not a problem to patch up soft-shell kayaks if they do suffer from damage. A rigid kayak, by contrast, is going to prove a little trickier to repair.

Cons

Maneuvrability

Rigid kayaks tend to be better in terms of their maneuverability than inflatables. They sit lower in the water, giving the kayaker more control.

Because soft-shells are light, they tend to be more easily pushed off course, and do not track as well in the water. They often feel sluggish, especially if you have just transitioned from a hard-shell.

Time To Inflate

You will need to build time into your kayaking trip for inflating the boat. You’ll also want to carry a pump, as inflating them by hand is slow and hard-work. On average, you’ll need about ten minutes per boat with a pump.

You also need to pay attention to the rigidity that your kayak can take if you have an inflatable. You want it to be as rigid as possible for best performance. That means you need to know what the PSI (pounds per square inch) is. This can be a bit of a nuisance.

Drying Time

You cannot store an inflatable while it is still wet. You’ll have to thoroughly dry it once you leave the water. Putting it away long-term while there is still moisture on or in it will lead to mold and could damage the material.

Rigid kayaks do also need attention when you get out of the water, but they can be rinsed and rubbed down with a towel. Other maintenance such as waxing can then be dealt with when it suits you, rather than immediately.

Lower Water Ability

If you’re planning to paddle in calm waters, blow-up kayaks will be fine. Many will even handle some rough water, although you’ll have to be careful of jagged rocks which could puncture the boat.

However, few inflatables are capable of taking on white water rapids. If you want to tackle very challenging waters, you will probably want a hard-shell. You’ll also enjoy the better steering and improved durability as extra benefits.

Puncture Risk

Although they are durable, you’re more likely to puncture a blow-up kayak than a rigid one. This is especially true if you’re in an area with sharp rocks or even broken glass. You need to handle them with slightly more care to avoid this.

The flip side of that is that they are easier to repair than a hard-shell. A good puncture repair kit will cover holes and make the kayak functional again.

Summary

There’s no simple answer to which kind of kayak is better. Inflatables can be suitable for beginners through to experts. They offer advantages in terms of their price, their portability and storage, and their stability.

As technology continues to advance and inflatables get better and better, they will likely outstrip hard-shell kayaks even for white water. However, at the moment, hard-shells still hold the edge in difficult conditions and remain easier to control.

How To Turn On Skis: Tips For Beginners


How To Turn While Skiing: Tips For Beginners

Anyone getting into the amazing sport that is skiing might be wondering about how to do things slightly more complicated than just going downhill. If that’s you, perhaps you’re thinking about how to redirect yourself without accidentally going flying. We’re going to look at how to turn while skiing: tips for beginners.

Turning is a bit of a tricky motion and may require some practice. There are two ways to make your skis change direction. You will need to both twist your body, making the skis skid, and tip your weight to the edge of the ski. The first method will reduce your speed quickly, while the second is much slower.

How To Turn On Skis

How Do You Start A Turn In Skiing?

We’re going to start by understanding a snowplow turn, as this is a basic starting point.Many people think this is the easiest because it keeps you stable.

You start simply by putting more weight on one foot than the other foot. The foot you put weight on will be facing in the direction you want to go in. Your left ski points to the right, and your right ski points to the left. When you want to move to the right, put more weight on your left ski.

It will take control, and because it points to the right, it will guide you in that direction. Essentially, you will lean onto the opposite foot of the way you want to go. It can take some practice, but you can do it.

How Do You Change The Direction Of Skiing?

Turning is the only way to change direction when you are skiing. There are many kinds of turns that you can learn how to execute. If you want to change direction quickly, you can lean more heavily on the opposite foot. This will increase its power over your direction.

Changing direction is important for slowing down. This is particularly true on steep slopes. You need to be able to move from side to side to stop gravity from pulling you down the slope. Gently turning your skis will help gradually shift you so that you are facing across the slope instead of down it.

Good advice is to look in the direction that you want to end up traveling in. This will usually help you to re-angle your feet. As long as you can keep your balance, once your feet are at the right angle, you will end up wherever you want to go!

How To Parallel Turn Ski?

Next on our list of how to turn while skiing: tips for beginners is how to execute a parallel turn. The snowplow is useful, but this is the next level. You should practice as soon as you have got the hang of the snowplow. It tends to be more graceful and may feel better.

Ideally, a parallel turn should involve keeping your skis the same width apart as your hips. They should not end up closer to each other or further away throughout the whole movement – hence the name.

This position will ensure that the skis end up at the same angle as you lean to the side. This will help you to move comfortably. You will also be well-balanced because your body will be in a natural position. You will not have one leg bent more than the other, etc.

Having the skis too far apart is common during the learning phase. This offers more balance but a more difficult movement. It often decreases the speed at which you can arc around.

Having the skis too close together can make it harder to balance. Because your knees will be closer together, you will have less control and less movement. It will be hard to get your skis onto their edge, which will decrease your ability to re-angle your movement.

Ski Short Turn Techniques

Short turns are a very useful way to stay in control of your speed and very helpful if you can master them. You should look to get the hang of these if you want to try out steep slopes, or you will struggle with speed. They will give you much more control over where and how you move.

There are some techniques that will make them more effective, which include:

  • Keep the poles moving. You should have a pole in the snow at every moment as this will give you good rhythm and movement.
  • Start on shallow slopes so that you don’t challenge yourself too quickly. You don’t want to pick up too much speed until you have mastered the technique.
  • Use your legs to shape the movement, rather than your hips or your shoulders. Your upper body does not need to move when you have mastered this movement.
  • Focus on rhythm. Make your transitions of weight from ski to ski smooth.
  • Do not lean forward or backward on the skis. You need to keep your balance in the center.
  • Stay facing downhill. If you do not twist your head, but only your lower body, you will stay on course.

Skiing Turns Types

There are quite a few turns you can master on the slopes. These include the snowplow and parallel, as already mentioned. Other turns are:

  • Stem, which combines the snowplow and the parallel.
  • Carved, which are tricky and cut into the snow.
  • Short, which are good for staying in control on a steep slope.
  • Jump, which are appropriate in very tight areas. These break contact between skis and snow. You will rarely use them, but they can be fun to learn.
  • Pivot, which rotate the ski 180 degrees across the slope.

As you gain confidence in skiing, you will be able to practice and combine turns for very creative movements. Remember that they are all a blend of the two movements mentioned at the start: the twist of the body and the tipping of your weight.

How To Slow Down Skiing?

Turning is the best way to slow down when skiing. The snowplow technique (not the turn) will help you slow you down on shallow slopes, but is not enough on steep slopes. You need to alter the angle of your skis on the slope to reduce gravity’s effect on your movement.

Turning regularly as you ski will prevent you from picking up too much speed and losing control, so it is really crucial to master the basics before you test more challenging slopes.

How Can I Improve My Ski Turns?

You can improve your ski turns primarily through practice. It is best to practice on easy slopes, rather than on challenging slopes. Master your techniques before you try them out on a difficult course.

Good balance and a strong core will help make your turns better. When you have just executed one turn, make any corrections to your stance and position before moving into the next one. This will make it easier to “feel” the correct version and get your body used to the positions.

Summary

Hopefully, how to turn while skiing: tips for beginners has helped you gain an understanding of some of the basic moves you can make. On the slopes, being able to redirect your movement and slow down or maintain your momentum can be crucial.

Work on the easy turns such as the snowplow and perhaps the parallel first, and move onto more difficult ones later.