Welcome To Thrill Addicted

Recent Posts

How To Stop On Skis For Beginners


How To Stop When Skiing For Beginners

Not learning how to stop skiing can make your world turn around. And by saying that, literally make your turn around while your head buzzes.

Stopping is the most important trick for you to learn when skiing. Without learning how to stop, you’ll crash against trees, people, and other obstacles in the ski resort.

Not to mention that you can’t perform fancy-looking tricks too. Some maneuvers in skiing require you to master the arm of stopping for their execution.

This is why ski instructors teach students how to stop before how to start moving forward. Making the ski move is easy. You have the slope and the poles to do the work for you. However, stopping – not that easy.

Stay here and read this article that serves as a quick crash course that will teach you how to stop when skiing for beginners. But before that, let’s answer the question.

How To Stop On Skis

Why  Learning How To Stop Is Essential For Beginners?

Recreational skiers zoom on their skis at 10 – 20 mph, downhill daredevils; 40 – 60 mph, Olympians; 70 – 95 mph, and professional athletes; 150 mph. As you see, the slowest average speed of a skier equals the slowest average speed of a moped, which is already enough to deal you with grave injuries if an accident happens

Okay, it’s already obvious that you need to learn how to stop so that you won’t get into accidents. But still, allow me to give you a quick explanation so that you stop seeing the art of stopping as nothing but a basic maneuver in skiing.

Crashing into a tree with a loud thud isn’t that terrifying. Injuries aren’t that serious, really. You only have to suffer from a bleeding nose, a buzzing head, dislocated or fractured bones, or sore muscles. Again,  not that serious.

You will also look cool at the ski resort if you ski without knowing how to stop. Cool enough to run over other skiers or bump on them. That being said,  cooly annoying.

If you don’t get what I mean, then let me rephrase the previous statements. Stopping is essential because it prevents you from injuring yourself and others as well.

Is Using The Skiing Pole The Most Basic Method To Stop When Skiing?

Seasoned skiers advise you not to use the skiing pole. The skiing pole is for moving and not for stopping. It’s designed to push you forward and not to cancel kinetic force.

So the skiing pole isn’t the most basic method of stopping when skiing.

However, this doesn’t mean that you can’t use it to decelerate; sometimes, using the skiing pole is acceptable if the beginner is only starting to get the hang of decelerating while skiing.

Leg and body coordination is essential when stopping. Most beginners don’t have this yet. This is when the skiing pole becomes useful.

If you’re moving slowly (say 2 mph or 5 mph), it’s not bad to stop using the skiing pole. It can help you make immediate stops just in case something is in the way.

But do you use the fishing pole to decelerate? It’s very basic. All you need to do is thrust the fishing pole on the snow in front of you.

However, understand that it’s only acceptable to use the skiing pole on your first 2 – 3 days at the ski resort. As soon as your feet are comfortable on the skis, ditch using the poles for stopping and use basic stopping methods in skiing ASAP (more about this later on).

So what happens if you use the skiing pole to stop when you’re moving fast downhill? Don’t even think about doing it. Using it can make you lose balance, stumble and roll hard downhill, or dislocate your arms or shoulders.

What’s The Basic Method To Stop When Skiing?

The snowplow method is the basic method to stop when seeing. It’s so easy that if you can’t learn it quickly, be ashamed because 10-year-olds sometimes get the hang of this technique without anyone teaching them.

To perfectly execute the snowplow, always remember to put the skis in a triangular position – front tips close and end tips apart.

You don’t have to move the ski forward to practice this for the first time. A nice flat terrain is where I recommend you to learn the snowplow.

To start, position your legs together at least half a meter apart. After this, start bringing the front tips of the skis together. Be sure, involve your knees and shins to make this easier. Stop once the front tips of the ski area 10 – 15 cm apart.

Keep repeating the above process until you can execute it without thinking about it.

Once you can perform the snowplow automatically while being stationary, incorporate a jump in your practice. All that you have to do is perform a mini jump while being in a neutral position, then execute a snowplow upon landing. When you mastered this, proceed to the final step of learning how to snowplow.

Go to an easy slope to start learning how to snowplow while moving. Practicing the snowplow while moving is a piece of cake. While moving, slowly bring the tips together. Remember to keep your balance by doing this. By the way, bend your knees a little to maintain balance.

As soon as the front tips are close to each other, the speed of your movement will start to decrease until you come to a halt.

How Effective Is The Snow Plow Method?

The snowplow effectively puts you to stop when skiing at slow to moderate speeds. This method decelerates your movement without requiring you to shift your body in any direction. With that said, the snowplow is the most relaxed way to stop when skiing.

However, you can’t use the snowplow if you’re skiing at fast speeds. Moving fast makes it hard to bring the tips of the ski together. Also, it can cause you to fall flat on the surface of the snow face first.

What’s The Most Uncomfortable Way To Stop When Skiing?

Using natural or artificial obstacles on the ski resort to stop is the most uncomfortable method to stop when skiing. Examples of obstacles that you may effectively use are snow mounds, exposed roots of trees, low lying branches of trees, ski runway crash guards, etc.

Utilizing these obstacles can put you to a stop no matter how fast you’re going. However, the consequence can be devastating. Snow mounds can make your trip and fall flat on the snow. Exposed roots of trees can injure your feet. Low lying branches can cut your fingers or slap your face. And crash guards can hurt your body big time.

Parallel Stop: A More Advanced Method of Snowplow

I forgot to mention that learning the snowplow opens the gates of learning effective turns. Its continuous utilization makes both of your feet flexible, thereby making it easier for you to turn your feet inside out or outside.

Snowplow plus directional control leads to the parallel stop – a method of stopping in skiing where you go right or left then proceed to perform a quick snowplow.

The parallel stop is an improved version of the snowplow. Unlike the snowplow, the delay of stopping is much shorter with a parallel stop. That’s why this method is best utilized if you’re skiing at speeds ranging from 20 mph – 30 mph.

Another way to perform a parallel stop is to lean on the side of the ski so that it digs on the now.  Note that the leaning should be done in the direction that counters where the slope is going.  Remember this because it counters the forward motion that the steepness of the slope brings.

Performing a parallel stop this way requires shifting body weight since you have to lean. As a newbie, certainly, you might not know the importance of this in skiing. Allow me to explain it to you quickly.

Bodyweight and Stopping

Your body weight can slightly offset your center of gravity on the ski. With the perfect balance on the ski, you can use this to your advantage for :

  • making sharp turns
  • digging on the snow with the ski
  • and performing flips and twists

Let’s leave the other two for the meantime and talk about digging on the snow only since the subject matter is all about how to stop when skiing for beginners.  Digging on the snow with the feet only is possible. However, doing so will be hard. That’s why to make it easier to have to use your body weight.

But how does bodyweight? Leaning right or left applies pressure on the tips of the ski. Now, this pressure makes the ski dig on the snow without the feet making any effort. And when the ski digs on the snow, friction is produced, which in turn leads to a more effective deceleration.

How To Stop In A Flash While Skiing?

What if obstacles suddenly appear out of nowhere while you’re skiing? At such a moment, what you need is to get yourself to stop abruptly without any delays. The previous stops that I taught you to fail to accomplish this. That’s why you have to have the hockey stop as a part of your skiing skillset.

The hockey stop is an instant top in skiing where you turn the tips of your skis 90 degrees. This type of stop has little to no delays.  It’s perfect for preventing collisions against people or trees, and deceleration for performing high-speed turns.

Mastering the hockey stop is a bit difficult. However, you’ll learn within weeks of continuous practice.

So how is a hockey stop performed? A hockey stop is performed by suddenly positioning perpendicular on the snow with your body weight going backward. What this does is dig the ski on the surface leading to the production of strong friction.

Bending your knees, putting your weight on the ski, adjusting the direction of your body weight’s fall, and keeping your legs firm are the secrets to executing a perfect hockey stop.

The hockey stop is an ideal method of stopping while skiing if you’re heavy. Having a sheer amount of weight makes it easier for you to make the skis dig on the snow.

By the way, you don’t use the hockey stop if there are lots of people around. Since this technique makes the skis dig on the snow, a lot of snow debris gets sprayed all over while doing it. This snow debris might fall on anyone and can hurt them.

You Can Also Use The Slope To Stop

The forward motion of the skis is produced by the downward terrain of the slope. That’s why if you turn and make the skis against it, you can also put yourself to a halt.

This method is actually very easy. All that you have to do is execute any turning maneuver that you already know. The only important thing to remember is to turn in a way that makes the skis face the upper sections of the slopes. This works because it cancels the kinetic force that comes from the slope’s downward terrain.

But this technique might not put you to a halt in all situations. Sometimes, if the snow is too slippery,  you might ski backward after doing this technique. If this situation happens, you can use the poles to cancel any remaining forward movement.

Hugging The Snow Is The Last Resort

You can also choose to make yourself fall on the snow as a last resort. Of course, doing this means that you have to smash your face and body on the slope itself. However, the pain that you feel after doing this is better than injuring yourself after falling from a low cliff, smashing on a tree, and encountering any other obstacles in the ski resort.


How To Stay Warm Camping In A Tent (Camping Tips)


How To Stay Warm Camping In A Tent (Camping Tips)

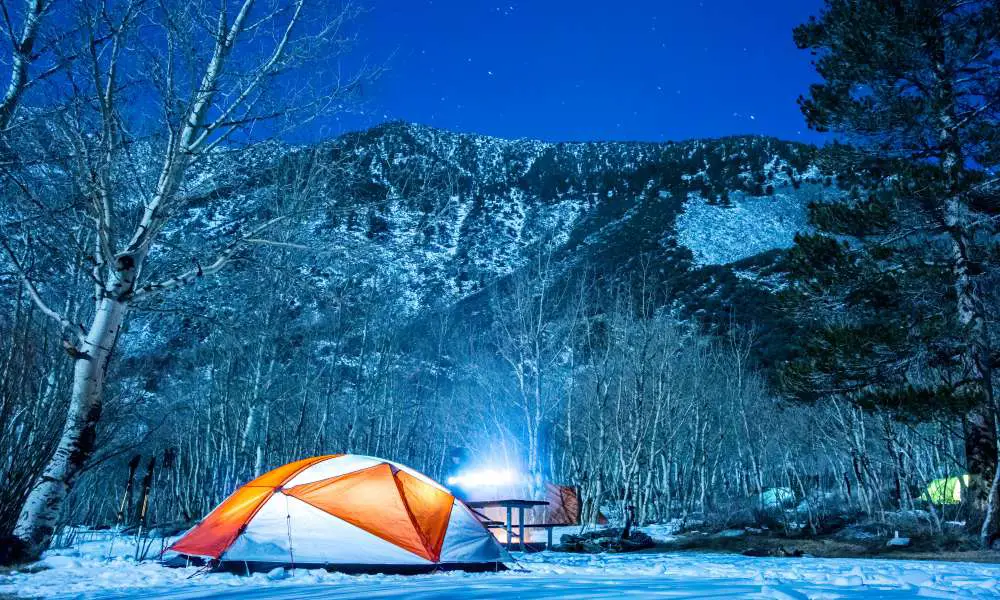
If you’re planning on camping somewhere this year, you’ll be thinking about all the things you need to take. One of the key things that might cross your mind is warmth at night, especially if you’re someone who feels the cold. So, we’re going to look at how to stay warm camping in a tent: camping tips.

There are quite a few clever tricks you can use to keep yourself warm in a tent. One of the best ones is to put insulation under your bed. A lot of heat is lost into the ground. Hot water bottles are also portable, light, and great for warming yourself up. Staying dry and pitching your camp somewhere sheltered are further good tricks for staying cozy.

How To Stay Warm Camping In A Tent

Tip One: The Right Size Weatherproof Tent

First things first: your tent needs to be weatherproof. That means waterproof and windproof. Do not go camping in cold conditions without a good tent that will protect you from the elements. You want a high-quality one that will keep you dry and won’t let every gust cut through you.

Size matters too. If you’re going camping solo, or even in a pair, avoid taking a tent that is designed for ten people. You’ll have more space for your belongings, but it will be very hard to keep that space warm with just the two of you.

Tents are an important part of staying insulated. Taking one that is approximately the right size for the number of people is key.

Tip Two: A Great Sleeping Bag

The same goes for your sleeping bag. Buy one that is the right size for you, and don’t camp in a monster sleeping bag. Smaller equals snugger, and will keep the heat in more effectively.

It’s important to invest in a high-quality sleeping bag, as well. Sleeping bags come with many different ratings, so take your time choosing. Get one that is for a warmer season than you expect to need. You can always unzip it if you end up too hot!

It’s worth spending money to ensure you have one that will keep you warm throughout camping trips. Nothing ruins camping faster than cold, miserable, sleepless nights, so don’t skimp on the sleeping bag.

Tip Three: A High-Quality Sleeping Mat

Layer up your bed; each layer will trap a pocket of air that will help to reduce heat loss. It is important to do this underneath you in particular.

You might think that piling the blankets on top is the best way to stay snug because heat rises. However, the ground will be a major source of cold and will pull warmth away from your body all night long.

You should always have a good insulating layer underneath you. A high-quality sleeping mat will be the best option. There are many good brands on the market that will make a big difference to your warmth at night. Alternatively, a picnic blanket or survival blanket can work well.

If you don’t have any of those things, you can use a sheet of cardboard. Cardboard has surprisingly good insulating properties and is also comfortable to lie on.

You can also use rugs and blankets if you prefer. As long as there is plenty to stop the heat from going down, you’ll be warmer, and you can then focus on the top layers.

You might think an air mattress is a good insulating layer, but it isn’t great. It may be warmer to lie on than the ground, but it isn’t warm. Air mattresses are the same temperature as the air around them, so again, it will be leaching your heat. You can use one, but you’ll have to put layers between it and your body.

If you have a good sleeping bag, be wary of piling too much on top of yourself. Doing so can squash the air out of the sleeping bag and stop it from insulating you so effectively. If you do decide to use lots of blankets, fluff your bed up before climb in. This will puff air back into the various layers. It should be done each night.

Tip Four: Not Too Many Layers

If you have a good sleeping bag, be wary of piling too much on top of yourself. Doing so can squash the air out of the sleeping bag and stop it from insulating you so effectively.

If you do decide to use lots of blankets, fluff your bed up before climb in. This will puff air back into the various layers. It should be done each night.

Tip Five: Suitable Clothes

Always pack at least one more set of warm clothes than you think you will need. You won’t be sorry. You may not need them every trip, but you will be extremely glad of them on some.

This is particularly true of socks. Having wet feet is the worst, and can make you very chilled. Have an extra pair of woolly socks reserved for bedtime that never gets taken out of the tent. These will always be dry and nice to slip your feet into.

Thermal clothing is also good if you have some, particularly thermal underwear, as this will trap heat right by your skin. If you don’t have any, you can still choose suitable clothing. Lots of thin layers are more effective than two or three heavy ones.

Choose moisture-wicking fabrics to wear besides your skin so that sweat is pulled away from your body and doesn’t cool your blood. Wool and silk are good options, but cotton tends to hold onto moisture.

Have a dedicated set of clothes for bedtime so they’ll be bone dry when you slip them on.

Tip Six: Hot Water Bottle

Next on our list of how to stay warm camping in a tent: camping tips is the humble hot water bottle.

If you have poor circulation, you might struggle to get warm even with the above tips. A hot water bottle is an ideal solution. They are light and easy to pack, but provide a steady source of heat throughout the night.

They are also great for emergencies and take up less space than extra blankets. Make sure you get one with a good cork so it can’t leak. Put it in your sleeping bag a bit before bedtime to ensure a cozy nest awaits you.

Tip Seven: Get Rid Of Moisture

When you get up in the morning, you’re likely to find that both your tent and your sleeping bag are slightly damp. There is a lot of moisture in a person’s breath, and you can perspire even when cold. This moisture has nowhere to go in a waterproof tent.

You should open the doors (unless it’s raining) to let this dampness escape. The inside of the tent will dry, and it will be warmer come evening.

Do the same for your sleeping bag and sleepwear. Unzip and fold your sleeping bag back so that the moisture inside has a chance to escape. If it’s sunny, consider hanging your sleeping gear outside to air and dry. Don’t let it get caught by sudden rain, though!

Tip Eight: Go To Bed Warm

This may sound easier said than done if you’re on a chilly trip. However, it’s much easier to get warm while you’re up than when you’re lying down. Do something active before bed if you’re cold – a few jumps, a lap, or two of the campground.

A big meal rich in calories may help too, giving your body fuel to burn. Eat well before bed, and then douse your fire and settle down quickly. Having a hot drink is also a good way to raise your temperature. You can snuggle into bed with a mug and get warmed through before you lie down for the night.

Summary

Hopefully, you enjoyed our ideas about how to stay warm camping in a tent: camping tips. Don’t suffer through cold nights. Layer up your bed, insulate yourself, and get warm before you settle down. These simple tricks can make all the difference!

How to Snorkel Without Swallowing Water


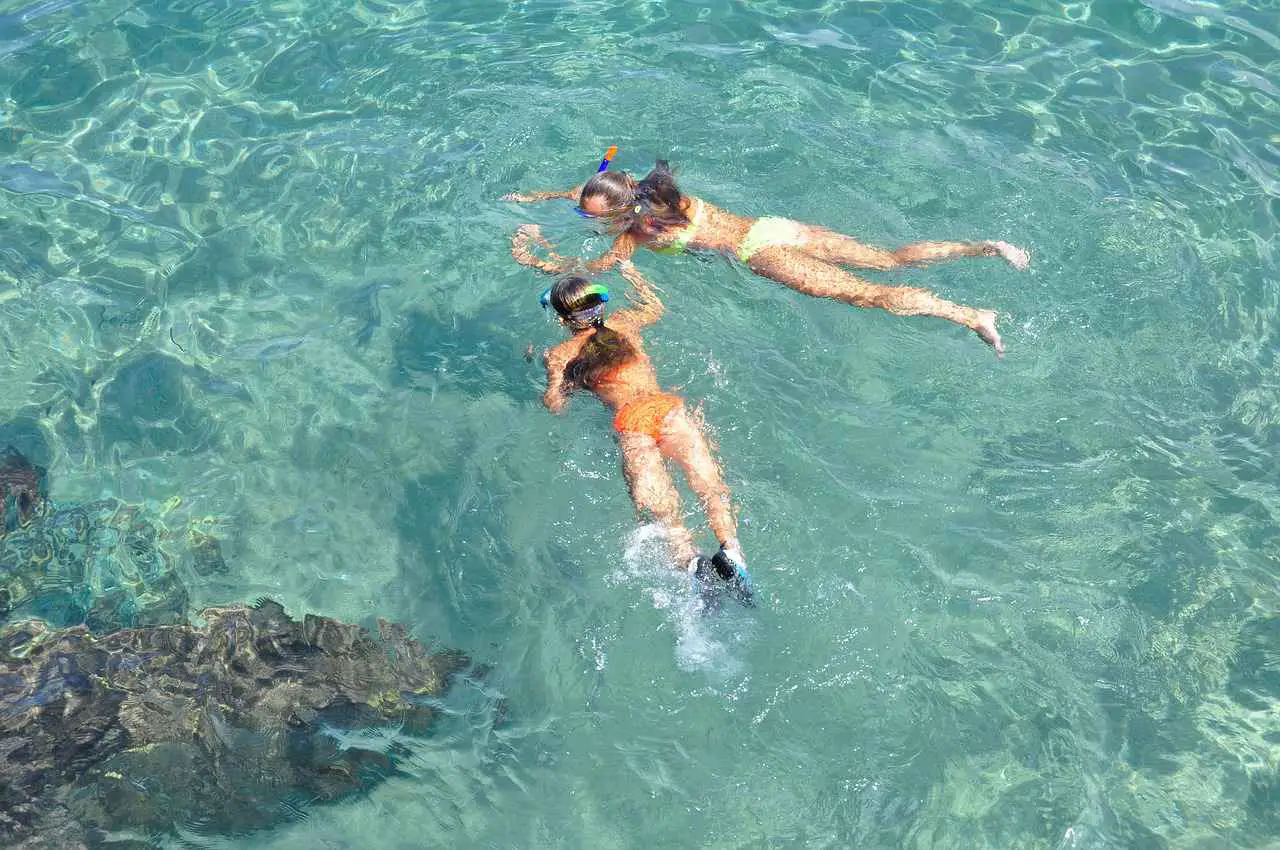
Do you love the idea of snorkeling? If you’ve never been, or you’re just starting out, perhaps you’re wondering how to snorkel without swallowing water. Unfortunately, it’s very easy to get liquid into your snorkel and then to swallow this – not a pleasant experience!

When you’re just practicing snorkeling, stay at the surface; not much water will go into your snorkel in the first place. Once you get more confident, you’ll want to start diving. Then, you’ll need to know how to get water out of your snorkel without taking off your mask. This can be done with a sharp exhale to drive it out of the tube.

How to Snorkel Without Swallowing Water

Stay On The Surface

If you’re at the surface to begin with, you should end up with less water in the pipe. You should stay with your head half above and half below the surface (so the back of your head is out). This will allow you to look down without ending up choking on the sea.

Staying near the surface will still let you see plenty of the underwater world. However, you won’t really risk liquid getting in the snorkel unless the surface is choppy. If it is, we’ll give you tips on how to clear the pipe out later.

Look Down

You don’t want to accidentally tip the end of your snorkel underwater, so try to look straight down. If you’re looking back under your body (toward your feet), you’re likely to get seawater in the tube.

Stare down at the bottom of the seafloor instead, and swim over anything you want to look at, rather than tilting your head. This will keep the pipe upright and minimize the amount of liquid that goes in.

Practice

Try and practice before you go out too deep or dive down below the surface. Breathing through a pipe can be an odd experience. It takes a bit of getting used to, so don’t just plunge into the depths.

Spend some time in the shallows, checking that your mask fits well and getting used to breathing through a tube. You need to breathe deeply and slowly while snorkeling. Some of the carbon dioxide will stay in the pipe on each cycle, which may make you feel you aren’t getting enough air.

Practice deep breathing and get used to the feeling before you test yourself in more challenging conditions. Some people like to do this on land before they even start to swim.

Once you have got the hang of it, you can head into deeper water. You’ll have mastered the sensation, and you’re also less likely to feel panicked if you do get some liquid in the tube or your mouth.

When you start diving, only dive a little way to begin with, so you can surface quickly. This will let you tip any liquid out of the tube easily. As you gain confidence, you can swim down deeper.

Use Your Tongue

Your tongue can serve as a sort of splash guard if you position it correctly in your mouth. If you aren’t sure whether the pipe is clear, press your tongue against the roof of your mouth.

When you inhale, any liquid in the tube will go under your tongue. This isn’t pleasant, but it’s better than inhaling it! You can then blow hard to force this back up the tube and out.

Don’t Rush

Next on our list of tips for how to snorkel without swallowing water: go slowly. If you’re swimming around too fast, you’re likely to splash your own snorkel. A lot of the fast swim strokes will also involve turning your head. This doesn’t work well when you’re snorkeling.

Usually, you’ll have fins on when snorkeling. If so, use these to glide around instead of trying to rush. They will make it much easier to swim in a relaxed manner. This, in turn, will make you less likely to swallow water.

To add to the relaxation of this activity, consider a floatation device such as an inflatable vest. This can make it much easier to just drift around, and will allow you to swim for longer periods of time, without getting too tired. If you aren’t a strong swimmer, it’s a great idea.

Get Fitted Equipment

Even a strong swimmer will struggle if their equipment isn’t the right size. Your mask should create a gentle suction against your face. When putting it on, inhale gently through your nose. If you feel it seal comfortably, it’s a good fit.

If it doesn’t seal, it’s too big. If it seals uncomfortably, it’s too small.

If you have long hair, consider tying it back so it doesn’t get in the way of the seal, or in your face.

The tube should fit at a 45 degree angle between the back of your head and the top. Enough should stick out so that it will protrude above the surface. The tube should feel comfortable in your mouth. It shouldn’t be tense or pulling away.

Empty Your Snorkel When Necessary

You are likely to need to empty water out of your snorkel sometimes. You can do this very simply by taking the end out of your mouth and tipping it out. However, this is annoying sometimes. It means you’ll need to tread water while you try and handle the equipment.

If you can get the hang of blowing air up to clear the pipe, this is often better. You need air in your lungs to do this. You want to exhale sharply, driving the liquid out of the pipe with the force of your breath.

This may take a bit of practice, but you should try and learn how to do it. It will save you a lot of time. Don’t panic if you find you can’t. You can always take the end out of your mouth and tip the water out instead.

Use A Nose Clip

Some people find it really challenging to breathe through their mouths only. If you’re using basic swim goggles instead of a mask, this is more likely to be the case. If you find you’re struggling, consider using a nose clip. This will close your nose and make sure you can only inhale through your mouth.

Don’t Dive Until You’re Ready

You might be eager to dive down and explore that tempting world below. However, you shouldn’t do this until you’ve practiced a bit first. You should take some deep, slow breaths, and make sure you are calm. When ready, draw in another deep breath, hold it, and dive.

You can buy special snorkels that will seal when underwater, so you don’t have to clear them when you return to the surface. Alternatively, you can learn to dive with an ordinary snorkel. Just take it out of your mouth or blow the liquid out when you surface.

Summary

If you’re eager to get swimming, hopefully you have enjoyed our tips on how to snorkel without swallowing water. Go slowly and practice. As long as you don’t panic if something goes wrong, you should be fine. Remember, you can always take the tube out of your mouth to breathe if it has started filling up with liquid!

How to Keep Bugs While Camping – Easiest Methods


How to Repel Bugs While Camping - Easiest Methods

Regardless if you camp in a natural park with a campsite or an undisturbed location that offers great camping in the wild, bugs are always there to disturb your peace. Read this article to find the best methods in keeping them away.

Can you bear the presence of bugs while camping? Not a chance! Bugs will make it hard for you to sleep by making the tent feel itchy. Your food is also at their mercy. If you don’t repel them, you’ll be surprised to see your ration in smithereens.

And so, hobbyists go to great lengths to reduce the presence of bugs in their campsite. How do seasoned campers do it? Keeping bugs away from the campsite is easy. Just follow good camping habits, use the right tent, and utilize natural insect repellents.

The next section provides a more detailed discussion about the answer above.

How to Keep Bugs Away When Camping

Keeping Bugs Away with Good Camping Habits

Good camping habits help to minimize the presence of bugs on the campsite. Some good camping habits that you should follow are:

Never Setting the Tent Near Moist Ground or a Body of Water

Poisonous bugs — centipedes and fire ants, for example —  like living on moist ground. These dwell underneath the remains of trees, leaves, or grasses. Setting up your tent near the moist ground is like inviting poisonous bugs to come and camp with you.

Mosquitoes, rivers, streams, and lakes have mini-pools or mud puddles where mosquitoes lay their eggs. That’s why you shouldn’t camp near this because you’re putting yourself in the mosquitoes’ lair.

Avoiding Powdery Ground as A Campsite

Have you ever tried setting the tent on a ground that’s powdery or sandy before? Kinda dusty, especially when the wind blows hard, right?

But aside from the dust, installing a tent on the powdery or sandy ground brings another problem – ants.

Ants are usually present in dusty places. It’s because they source dust particles for building or repairing their nest. Still, this doesn’t apply to all. Some species of ants dwell on grasses and trees.

Avoiding Trees and Flower Fields as a Campsite

Camping under a huge tree or a flower field is enticing. Camping under a shade or in the middle of a field with polychromatic hues is extraordinary. Still, know that you’re exposing yourself to bees or wasps.

Bees and wasps love to build their hives on trees or under thick patches of flower fields in the wild. It’s easy to overlook their hives, so don’t test your luck.

Putting Bug Bait

You can use baits so that bugs don’t get to your campsite. All you have to do is put food and other things that attract bugs on a location – a tree, a patch of grass, etc. – that’s at least 1 to 2 meters away from the tent.

This method is really useful for flies, ants, centipedes, and black widows. But for mosquitoes, this isn’t very effective.

Keeping Bugs Away with Your Tent

The right tent can help you keep bugs away even if you don’t start a fire outside. Let’s discuss the features that make a tent “right.”

Permethrin Treated Construction

When buying tents, do you immediately pick those that look spacious and beautiful? Question; do the space and beauty of the tent prevent bugs from pestering you? Probably not, right?

You’ll appreciate an unappealing tent with bug-repelling features than a tent that’s pleasing on the eyes yet can’t fend off bugs.

Most tent brands claim that their products are bug-proof. Still, many of these are just marketing gimmicks. Bug-free tents that truly hold to their promise don’t put the ” bug-proof” label on their specs. What’s engraved instead is the term “permethrin-treated.”

Tents that use fabric treated with permethrin instantly kills mosquitoes and other bugs that get into contact. Permethrin can harm your health. Even so, permethrin-treated tents are safe because they use fabrics that prevent transference through inhalation or contact with the skin.

For a recommendation, a great company that makes permethrin-teated tents is Wenzel.

Mesh-Covered Openings

Keeping bugs away from getting inside the tent is easy. All you have to do is close all openings and sleep peacefully.

Well, that’s easier said than done. If you close the tent completely, the interior will become unbearably warm. Not to mention that you won’t get enough air for a good sleep.

Of course, you may use a portable fan. Still, it will do nothing but alleviate the discomfort a bit. So as a final verdict, closing all the openings of the tent to keep bugs away isn’t a viable option.

Since this is the case, a tent with openings that come with mesh covers is ideal. A mesh cover consists of tiny holes that allow air to come in, which are too small for bugs like mosquitoes to penetrate. Simply put, it’s a feature that keeps the tent airy without compromising your comfort against bugs.

Use Natural Insect Repellent

You may use natural insect repellent for keeping bugs away as these are cheaper than synthetic natural repellents. Aside from being cheap, natural insect repellants are more ideal because they don’t affect the environment.

Indian Prickly Ash Essential Oil

The Indian Prickly Ash Essential oil can repel mosquitoes for at least 5 hours or 2 hours. However, no studies show that it can repel other bugs.

Despite this, Indian Prickly Ash Essential Oil is worth the try because it has a licorice-like fragrance. It has a warming licorice-like smell and provides a wonderful vibe that matches the view of the campsite in the afternoon.

Dried Corn Cobs

Dried corn cobs produce a lot of smoke which bugs hate a lot. It has a neutral dusty smell that might hurt the nose. Nevertheless, smoke that comes from the corn cob does well against bees, ants, and mosquitoes.

Just toss dried corn cobs on the campfire to use them as a natural insect repellent. However, be sure not to put more than 8 pieces at once, or you’ll end up enveloping the campsite with thick smoke.

Cedarwood Essential Oil

Cedarwood has been a natural insect repellant for many generations. Not only does it repel mosquitoes, but it also repels moths. It even deters ticks from infesting your tent.

Patchouli Essential Oil

Patchouli essential oil is famous for its fragrance. However, aside from its aromatic trait, many love patchouli essential due to its insect repellent properties. Bugs that it can repel are fleas, moths, mosquitoes, flies, ants, and bed bugs.

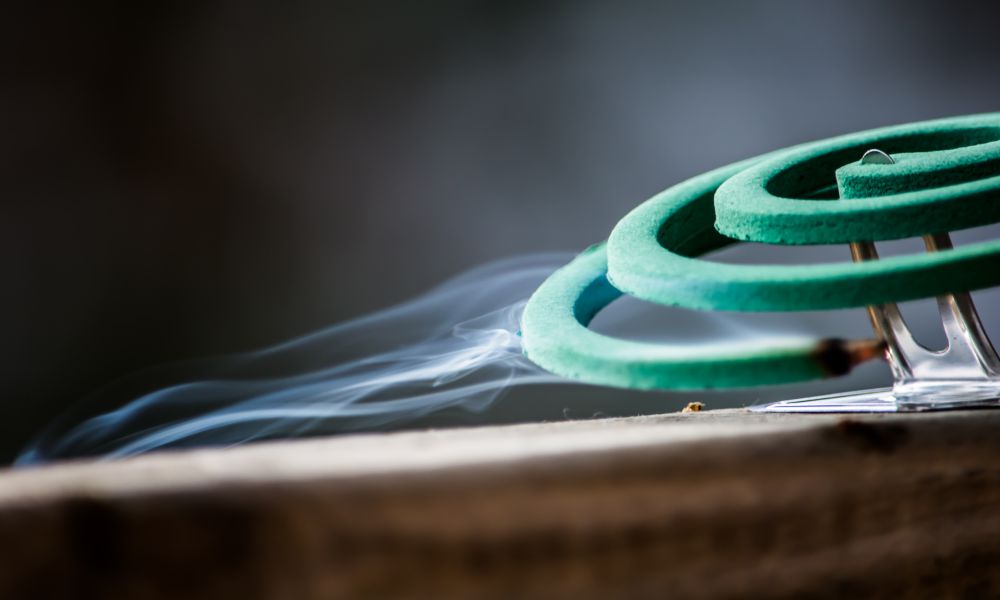
The roots of patchouli also hold potential as an insect repellant. According to this study, patchouli root is as effective as mosquito coils made out of transfluthrin. However, it’s more beneficial because it easily decomposes in nature.

Wood and Dry Leaves or Grasses

If you forgot to bring insect repellent with you, use what’s around the campsite instead – dry grass or leaves and wood. These produce smoke when burned slowly, which bugs don’t totally like.

Wood and dry grass or leaves aren’t that effective. However, using them as bug repellent is better than bearing with the discomfort that bugs bring. In camping being resourceful, it’s important. That’s why learn to use what’s available around you in case you forget to bring a good insect repellent.

What Are the Most Common Bugs That You’ll Meet While Camping?

Wherever you camp, mosquitoes will always be around. These will pester you every morning, afternoon, and evening. These are not deadly. However, their bite may cause malaria, dengue, and other types of more complicated diseases.

Ants are common aside from mosquitoes. Ants get to your tent and feed on the food. They also make the tent hard to sleep on. Mosquitoes are very noisy, and a swam that looms over your tent can be crazily disturbing with their endless buzzing.

Midges will also come and visit. These tiny flies will make a hell out of your camping trip by pestering you with their itchy bites. Midges are not deadly. However, their bites can trigger an allergic reaction.

Have you experienced contact with chiggers before? If not, hope that it will never happen. Chiggers are common camping bugs that burrow on the folds of your skin. After burrowing, they then cause swelling and itching.

So far, these are the most common bags that you’ll encounter. Even so, you can’t rule out the possibility of dangerous bugs visiting your campsite.

A Brief Talk about Dangerous Bugs While Camping

Some bugs have toxins that deal with short-term or long-term effects. These bugs can gravely injure or put you at risk of death.

Dangerous bugs that you might have to deal with are fire ants, centipedes, bees, wasps, and black widows. A sting from fire ants might result in a severe allergic reaction characterized by the swelling of the throat leading to suffocation.

Centipedes carry excruciatingly painful venom. A bite from them won’t kill. However, it’s enough to impair mobility or weaken you.

Exposure to black widows is perilous. Even making them more dangerous is their discreet presence. Most of the time, it’s hard to know that black widows are there until they sting you. Black widows’ sting can kill or make you sick.

Pray that you don’t encounter bees and wasps while camping. If provoked, these bugs will stop at nothing to get you. Facing an entire colony is tantamount to knocking on death’s door. Continuous stings from bees and wasps result in anaphylaxis.

The presence of botflies is very disturbing. These are bugs that will make a living nest out of you by laying their eggs on your skin. Once the eggs hatch, their larvae live under the skin and feed on it. Botfly larvae cause your skin to swell and get infected.

Should You Use Commercial Insect Repellents?

Nothing’s wrong with commercial insect repellants. However, we suggest that you ditch using them since they harm the environment. Insect repellents carry toxins. And if disposed of carelessly, they release the toxins on the ground affecting plants and other living organisms,

Moreover, they can affect your health too. According to this study, 11.8% of the research population, who continually used insect repellents, stated they’re currently experiencing some minor health concerns.

But setting research evidence aside, commercial insect repellants aren’t truly healthy with common knowledge alone. Most may trigger nausea, vomiting, and dizziness. Some, when inhaled directly in large amounts, may even cause asthma and fainting. Sometimes, they even cause skin and eye irritation.

So to ensure that you’re health is safe, use the natural insect repellents above. It’s because they don’t bring adverse effects even when used for the long term.

How about Portable Electronic Insect Repellents?

Portable electronic insect repellents keep bugs away, especially mosquitoes, without using natural compounds or chemicals. These protect you from bugs in an environmentally friendly way. So, using portable electronic insect repellents is okay.

Using portable electronic insect repellents isn’t uncomfortable. They don’t release odor. Moreover, they don’t take space from the tent. Portable insect repellents repel bugs by releasing low-frequency sound waves. Also, these are slimly designed so that you may place them in any spot inside the tent.

However, portable electronic insect repellents aren’t very effective against ants, bees, flies, and other bugs. Most only do well in repelling against mosquitoes. With that being said, if you suspect that lots of bugs are present in the campsite aside from mosquitoes, bring other types of bug repellents as well.

Final Thoughts

Aside from the methods above, you may repel bugs with simple steps. For example, wearing trousers and long-sleeved clothing will keep bugs away from your skin.

Keeping your campsite clean is another simple method. Most bugs are attracted to food. That’s why you should never leave this exposed in the open. Before putting them in the tent, be sure to put your ration in a tightly sealed camping box, cellophane, or any other container.

Bugs will greatly disturb your camping trip. That’s why you should always find a way to free yourself from them. Start with the methods that this article presented.

How To Protect Yourself From Snakes When Camping


How To Protect Yourself From Snakes When Camping

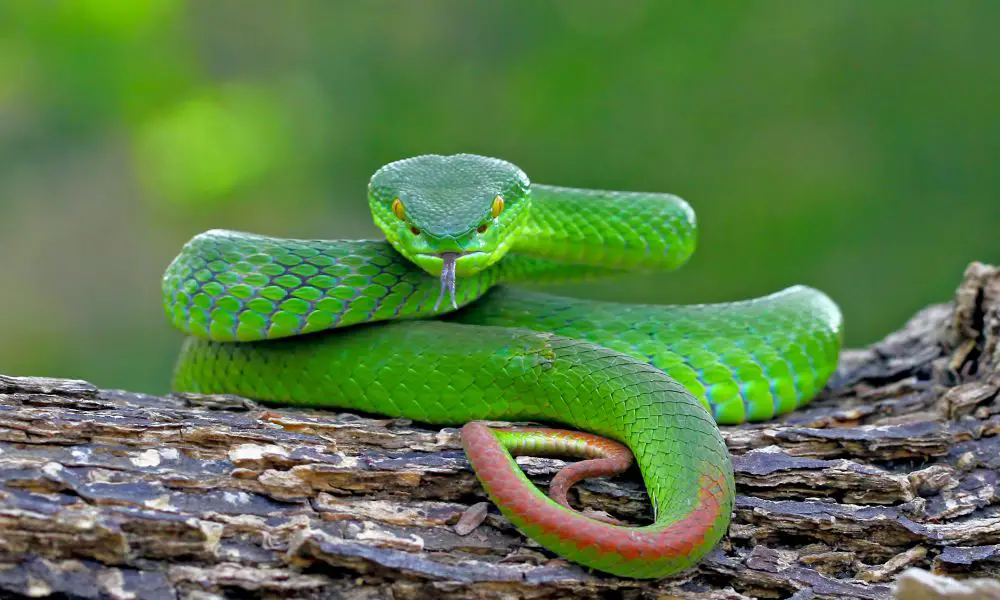
As long as there’s wood and grass around, a snake is always likely to be nearby. By some stroke of good luck, this snake might decide to take a stroll within your campsite.

A snake that made its way to your campsite is often hard to detect. It might have coiled on spots that you never expect it to be.

Death and snakebite are almost the same. You can still call for help. However, it’s only a matter of minutes before the venom paralyzes you and impairs breathing, movement, and heart rate.

If you are going to camp in a location where a snake’s presence is most likely, read this article first. Learn how to keep snakes away from your campsite.

How To Protect Yourself From Snakes When Camping

What Attracts Snakes To Your Tent

Your tent produces a lot of shade, and this is what entices the snakes to come. If not searching for food or a mate, snakes roam around to look for a place that keeps them away from sunlight. Snakes when camping are dangerous.

But why look for a shade? Snakes are cold-blooded animals. They can’t keep their own body temperatures. Exposure to sunlight kills them.

You shouldn’t rule out the possibility that the campsite is the snakes’ territory. That’s why before setting up camp, check the site for signs of a snakes’ presence, such as holes on the ground, sheds of skin, eggs, and snake sounds (hiss, rattle, whistle, etc.)

Snakes rarely go to your tent to search for food. However, this is another situation that you shouldn’t be careless about. A camping food that snakes might hunt for is eggs. They might also get attracted to freshly caught fish, freshly hunted small mammals, and birds.

The probability of snakes going to the tent isn’t slim. It’s safe to say that at least 3 out of 10 campers experience it. So, you need to employ vigilance all the time when staying in snake-prone camping locations.

How To Keep Snakes Away When Sleeping On The Ground?

If you’re sleeping on the ground, the best method to keep snakes away is to make a campfire. Of course, you shouldn’t make just any normal campfire out there. Be sure to make one that burns brightly and produces a lot of heat.

Fireworks because it gives off two things that snakes hate – smoke and heat. Snakes don’t like smoke due to its smell. It also stings their eyes. Heat wards off snakes because it raises their body temperature, which is potentially dangerous for these cold-blooded animals.

Another effective method is spreading gas all around the campsite. For humans, gasoline and diesel have a sweet smell. However, it’s the opposite for snakes. For them, gasoline and diesel smell confusing or threatening.

But on an occasion where you can’t make a fire, what do you do? If you have a hammock with you, then use that instead of sleeping on the ground.

However, if you don’t have a hammock, sleeping options that you can do is elevate your sleeping space by making a makeshift platform made out of arm-sized branches or sleep on the RV.

Can Snakes Bite Through Tents or Sleeping Bags?

Many consider snakes biting through tents or sleeping bags as a myth. However, this is a scenario that’s not impossible to occur. Depending on its level of aggressiveness and its growth, a snake can puncture holes in tents and sleeping bags.

To give you a rough idea, let’s compare the average thickness of sleeping bags and tents to the average length of snake fangs.

The thickness of sleeping bags and tents usually falls within measures of millimeters, which means that they’re not that thick. Include the additional layering, if there are any, and thickness averages 1 inch at most.

On the other hand, the fangs of fully grow snakes are between 1 – 2 inches. If you compare it to the average thickness of tents and sleeping bags, it’s safe to say that snakes can easily bite through.

Snakes are most likely to bite through the tent during mating season. During mating season, snakes are cross and won’t think twice about biting any strange object that they stumble with.

But know that there are specific snake species that might bite through the tents or sleeping bags even if it’s not mating season. Highly aggressive snakes such as rattlesnakes, gaboon vipers, and Mojave green won’t think twice about digging their fangs on the sleeping bags or tents.

How about the aggressive black mamba? This snake is only found in specific parts of Africa. That’s why you shouldn’t worry about it unless you’re camping there.

Do Snakes Crawl Into Sleeping Bags?

So you left the campsite to look for firewood or check the traps, and you forgot to fold the sleeping bag and left it out in the open. The question is; Can a snake slip into the sleeping bag undetected?

The answer is a profound yes. A sleeping bag provides a lot of shade during the daytime and optimal warmth during nighttime – habitat conditions that snakes love.

That’s why you shouldn’t fail to tuck the sleeping bag every time you’re not using it. You have to follow this tip faithfully if you don’t want to sleep in a sleeping bag with a snake between your legs.

If you’re lazy to tuck the sleeping bag after you used it, you can just hang it on a tree or any other high-standing object in the campsite that’s exposed to a lot of sunlight.

Understand that a snake, which found its way on the sleeping bag, won’t think twice about biting the moment you enter. The most susceptible parts of your body are the arms, hands, legs, and feet

Veteran campers always shake the sleeping bag before using it for the night. The act of shaking easily reveals the presence of snakes, no matter how small.

But what if a snake did bit you while you’re in the tent or you’re about to slip into the sleeping bag? In case you failed to protect yourself, head to the section below to learn how to treat a snake bite while camping.

How To Treat A Snake Bite While Camping?

Assuming That A Non-Venomous Snake Bit You

Bites from non-venomous snakes are painful but aren’t life-threatening. You’re fine so long as the wound doesn’t get infected. Remedies that you can do are as follows:

  • bath the wound with lukewarm water
  • cover it with strips of cloth
  • prevent it from getting moist
  • use lemon balm, lavender, comfrey, and other wild camping herbs

But what are the non-venomous snakes that you might encounter while camping? Here they are:

  • Eastern Hognose snake – has a broad head and an upturned snout. It can appear as a snake with a yellow, gray, orange, or red coloration.
  • Texas Brown Snake – a thin snake with a brown coloration and dark spots on its back
  • Texas Rat Snake – has a streamlined light brown or gray colored body
  • Rough Green Snake – a snake with a dominant emerald coloration and white scales on its belly
  • Eastern Yellow-Bellied Racer – a snake that resembles the look of venomous cottonmouth snakes
  • Blotched Water Snake – has a brown coloration that’s mixed with dark brown diamond-shaped patterns
  • Broad Banded Water Snake – has a robust constitution that’s embedded with yellow and dark colorations.

Assuming That A Venomous Snake Bit You

If a venomous snake bit you, don’t get nervous. This is very crucial. Getting shaky will accelerate your heart rate. Your blood pressure rises when this happens, making it easy for the venom to spread.

Get a cloth and tie the portion of your body just above the wound. Remember to tie tightly so that the venom that’s on the wound doesn’t spread fast.

After tying, get water lukewarm water and clean the wound. This will be painful, so bear with it. Find a stick (you will need this for support ) and walk back to your car.

While on your way to your car, call 911 and inform the officers of your circumstances. Don’t forget to call friends or family who can immediately come to your rescue.

After doing all of these, wait patiently in the car. Monitor your breathing and heart rate. Keep staying calm until help arrives. If a veterinary clinic, hospital, or ranger outpost is only a few meters away, you may also drive toward it if you can manage.

How Do You Keep Snakes Away When Camping?

Bring A Portable MP3 Player

Snakes don’t have ears. However, they can feel vibrations from sounds. Strong vibrations scare them. That’s why bringing a portable MP3 player and playing it loudly is a viable method to keep them away.

Ideal sounds for you to play on the MP3 player are music with high bass output. Examples are EDM and modern pop songs

De-Clutter The Campsite

Don’t forget to keep the campsite orderly. Clear it of dead leaves, branches, large rocks, and other objects where snakes can potentially hide.

Aside from the campsite, the tent itself has to be orderly too. Fold all used clothing because a snake might hide under them if you leave them scattered on the flooring. On the other hand, if you’re using a sleeping bag, fold it, hang it, or keep it close if not in use.

Whip Grasses With A Stick

If thick grasses surround the campsite, get a stick and whip them. The whipping will cause a ruckus, and this will scare the snakes hiding underneath. Of course, the stick that you should use is long ( at least 2 meters) so that you don’t get bitten if ever snakes are really present.

Avoid Throwing Bits Of Food Around The Campsite

Throwing bits of food around the campsite attracts small mammals and birds. Snakes see these as food. That’s why the frequent visitation of small mammals and birds makes your tent more susceptible to the presence of snakes.

Instead of throwing, keep fruit peels, leftovers, and other bits of food in odor-free resealable cellophane. This method keeps birds and small mammals away effectively. Also, it’s an environment-friendly option in keeping the tent clean since you’re not littering.

Get A Dog Or A Cat

A dog or a cat doesn’t keep snakes away. However, alerts you of the presence of snakes. Cats and dogs have keen eyesight. They can easily see snakes even if their well-camouflaged to the surroundings. Also, no matter how discreet the snakes slither, dogs and cats can hear them.

What Smell Do Snake Hate?

Snakes don’t like the smell of ammonia. There are numerous ways for you to utilize ammonia to chase snakes away. One method is to spread 1 – 3 bottles on the grass or ground surrounding the campsite. You may also slather a bit of ammonia on the sleeping bag or tent.

The smell of garlic is also unbearable to snakes. Snakes get disoriented once they’re exposed to strong scents of garlic. Garlic is the most effective natural repellent against snakes. This is the reason why huge gardens always have this herb.

A citrusy smell is refreshing for us humans. However, it’s a curse upon snakes. Scents that come from lime, orange, and other citrus fruits affect the snakes’ eyesight and nose. Citrusy smells make the snakes lose their sense of direction or lose track of their prey.

Try using cinnamon oil too. It’s common knowledge that snakes never get near things that get sprayed with this. The snakes’ sense of smell is very sensitive to cinnamon oil. It’s not clear how cinnamon oil smells like for snakes. However, they can’t stand it. In case you don’t like cinnamon oil, clove oil is also equally effective.

Do Fake Owls Keep Snakes Away?

Fake owls keep snakes away. But how? Owls are the natural predators of snakes. That’s why anything that excellently resembles owls scares them. Of course, for the fake owls to work well. They must be visible to the snakes. So if you’re planning to get fake owls for camping, get ones that are big and brightly colored.

It’s even better if the fake owl is installed with a built-in sound. This will fool the snakes into thinking that the fake owl is real. Still, fake owls don’t work all the time. They might fail to scare snakes that have grown more than 2 – 3 meters in length.

How to Keep Wild Animals Away While Camping


How to Keep Wild Animals Away While Camping?

Ensure your safety in the woods! Encounters with wild animals are either perilous or discomforting. Read this guide that teaches you how to keep wild animals away while camping.

Understand that the campgrounds, especially those that public organizations don’t maintain, aren’t your domain. The forest, marsh, or any other campsite is home to wild animals.

That’s why you should be wary. Though chances are slim, wild animals can potentially injure or kill you. For this reason, don’t head out without knowing how to keep them away.

So how do you keep wild animals away from camping? That’s easy, just camp with a lot of people and you’re good. However, if you want to camp alone, keep reading because you’ll know how to ward off foxes, bears, moose, and other kinds of wild animals that might ruin your camping trip.

How to Keep Wild Animals Away While Camping

1: Keeping Bears Away

Bears top the list of the most dangerous animals that you’ll encounter during a camping trip. They’re unpredictable, so you never know what might happen upon encountering them. With their sharp claws and long, sharp canines, it’s easy for bears to inflict you with grave wounds.

When is the Highest Chance of Encountering Bears?

Bears usually come out at the beginning of spring, just about when food such as fruits and meat become readily available for them. Male bears get out of their dens in mid-March. Females, on the other hand, come out of their dens in mid-April.

It’s best to avoid camping on campsites on woodlands during the previously mentioned months. After waking from their long slumber, most bears are very aggressive as they are hungry.

Bear attacks are common during July and August. This might be due to the frequent roaming of the bears in different areas to look for a mate.

How to Keep Bears Away While Camping?

Bears can easily rip you to shreds. A single swing from them can easily cleave some of your flesh, causing severe bleeding. Of course, this is only one of the injuries that bears might inflict you with. So, keep your campsite bear-proof. Here’s how you do it.

Don’t Leave Food out In the Open

Always put your ratios in odor-proof storage when camping. Bears are attracted to food. Their sense of smell is stronger than that of a bloodhound. That’s why they can sniff the faintest aroma of food from miles away.

You’re in trouble if the bear that decided to visit the campsite has just emerged from hibernation. It will not think twice about eating your food. What’s worse is that it may even invade your tent to search for more.

Did you bring a pet with you? If that’s the case, know that its food isn’t exempt from the bears’ appetite too. All bears wouldn’t mind eating pellets, bones, and other kinds of pet goodies available.

Bears wouldn’t mind scavenging for food. That’s why always clean the tent after eating. Don’t leave any crumbs or traces of leftovers near the campsite because these can attract bears.

Don’t Use Sweet Smelling Insect Repellents

Bears love sweet-smelling things. Of course, this isn’t only food but also other commercial products, such as insect repellents. Insect repellents effectively release particles into the air, which bears can easily sniff. And once these particles carry agreeable fragrance, the bears will find the source of the tent without thinking twice.

Examples of insect repellents that you should avoid using in non-bear-free campsites are honey-scented insect repellents, flower-scented insect repellents, caramel scented insect repellents, etc.

Put Ammonia or Apple Cider Vinegar Outside

Bears don’t like ammonia and apple cider vinegar. The smell of these liquids just feels too strong for their nose. That’s why these can effectively mask the odors that bears find attractive. To use ammonia and apple cider vinegar, just get an open container and hang it outside.

In Case You Encounter Them Face to Face, How Do You Keep Bears Away?

It’s the moment of truth. A bear found its way into your campsite. Life isn’t a movie, so always assume that this bear isn’t as harmless as Winnie The Pooh. Avoid being frozen with fear. Muster your courage, grab a pan or any other utensil that produces a loud sound, and start banging like crazy.

But why do this? Loud noises make a bear surprised and, in effect, make it less curious about the goodies that you have. Doing this is easier said than done. However, don’t stop banging those utensils as if there’s no tomorrow because it will save your life.

DON’T RUN! Running will just aggravate the situation. Also, thinking that you can outrun a bear is wishful thinking. Though it looks flabby, it is surprisingly agile. A bear’s maximum speed, when running, ranges from 30 kph – 50 kph ( yeah, a bear is faster than your average electric bike or electric scooter).

2: Keeping Moose Away

The moose is a docile animal. It will just idly watch as you do things on your campsite. However, there are moments when the moose becomes very aggressive. Moose attacks are rare. However, a full-on confrontation with a moose will result in a one-sided match where you’ll likely end up dead.

When Is the Highest Chance of Encountering a Moose?

A moose might find its way into your tent during September, October, and November. It’s more likely for males to go near your tent than females. This is because these months are when the male moose look for a mate before winter arrives.

Autumn encounters with a moose are highly dangerous. This is because its horns are sharp and wide. Pair this with its edgy mood during such time, and you’re in for a perilous moment if you encounter one.

Coming in contact with a moose isn’t as common as bear encounters. Moreover, attacks aren’t as common too. Nevertheless, you should still employ precautions when camping in an area with a high moose population. A rampaging moose won’t stop until it gets you.

How to Keep a Moose Away while Camping?

Keep a Dog with You

The only way for you to prevent a moose from coming is to get Have a dog as a companion. It’s hard to detect when a moose is nearby because its movements are very discreet. That’s why you need a warning device, like a pooch, for example.

After confirming that a moose is present, it’s best not to panic and watch it closely. Usually, a moose will just mind its business; however, if it doesn’t and attempts to go near the tent, be vigilant for these signs, which indicate that a moose is going to attack you.

  • moose keep staring at you
  • starts flexing its horns
  • scrapes one of its front hooves on the ground
  • makes a loud snorting noise

What to Do if the Moose Is Acting Aggressively?

If the moose is displaying the behaviors on the above bullet, then it’s time for you to act. Just like a bear, you can never outrun a moose. Instead of running mindlessly, look for a thicket where you may insert yourself or a tree that you can easily climb.

3. Keeping Wolves Away

Encountering wolves is an immediate red alert. They’re not visiting the campsite just to watch you do your thing. They’re present because they want to make use of the food that’s available to them. What’s even worse is that they come in groups. You will only see 2 at first. Later on, another 3 joined the group. Eventually, without noticing it, you realize that a pack is now baring their fangs at you.

When is the Highest Chance of Wolf Encounters?

Encountering wolves is very rare. That’s why you shouldn’t worry a lot about encountering a pack when camping in a wolf country. Most of the time, wolves love to stay away from humans. It’s common for them to keep their distance from a campsite and head to other locations to look for food.

How to Keep Wolves Away?

Don’t Bring Bloody Food when Camping

Never attempt to bring bloody food when camping in an area where wolves are common. Fishes and meats – clean these first at home and let their blood drip off. Blood attracts and makes wolves crazy.

Don’t Leave Utensil’s Dirty

Dirty utensils attract wolves too. That’s why you should clean the pan, grills, skillets, and other utensils before doing anything else. If not cleaned, the smell from these makes the wolves think that an adequate food source is nearby. A pack will then search for the source and reach your tent.

Keep a Fire Burning

Wolves are suckers against fire. That’s why a campfire should be near the tent, even if you have LED lights with you. Of course, the campfire shouldn’t burn sloppily. Use a lot of firewood so that it rages brightly. Ideal firewood to use is maple, oak, ash, and birch.

By the way, you may also try smoking off the wolves away from your tent. Wolves hate smoke because it stings their nose and eyes. This method is very useful if you can’t make a bright campfire. To make a thick smoke, you may use slightly moist dead leaves, grasses, and fallen branches of surrounding trees.

What to Do if a Pack Of Wolves Surround You?

Look for a nearby tree and slowly make your way to it. Face the wolves and gradually walk backward to go to it. After that, climb the tree with all your might. Wolves can’t climb trees. Moreover, being on top of a tree provides you height advantage.

If a tree isn’t around, then make a sound noise and stand tall. Doing this can confuse the wolves and, thus, remove their interest or curiosity in you.

4. Keeping Skunks Away

A spray from a skunk puts an immediate end to your camping trip, no negotiations asked. Skunk spray smells so horrible that a tent or any other camping gear that receives it becomes useless. A skunk cannot kill you. However, its spray can be the death of your camping trip.

When Is the Highest Chance of Encountering Skunks?

Skunks are active throughout the year. They’ll venture to your tent at night to look for scraps of food and other objects that they can nibble on. When camping, it’s possible for at least 2–3 skunks to come and visit. Skunks are harmless. However, surprise or scare them, and you’re in for a nasty time

How to Keep Skunks Away?

Use Mothballs

Skunks hate the smell of mothballs. To use mothballs against skunks, put one piece on each corner of the tent. If you have kids or pets camping with you, hide the mothballs to steer clear of poisoning-related accidents.

Use Vinegar

Skunks don’t like the smell of vinegar too. To ward of skunks using this, bring a few pieces of unused cloth or fabric and soak them. After soaking, look for a tree or any other high-standing object on the campsite and hang the cloth or fabric. You don’t want to keep these near your tent because the sour aroma is hard to bear.

5. Keeping Chipmunks Away

Squirrels look very cute. However, they can also wreak havoc on your campsite. They might tear the sides of the tent, steal your rations, or make the surroundings messy.

When Is the Highest Chance of Encountering Squirrels?

You’ll likely encounter squirrels when camping in the fall and spring. All that reaches your tent will try to get their paws on the food that you have. If you let them be, squirrels will gobble all of your rations up or make holes in the tent. Squirrel attacks can happen but are always rare.

How to Keep Squirrels Away?

Pound Garlic and Spread It around the Tent

Squirrels don’t like the pungent odor of garlic. That’s why it’s a very effective natural repellant for them. To use it, you just have to pound few cloves and spread them around the tent. However, be careful not to spread too much because the smell might penetrate inside.